Since I plan on spending some serious money in the future, I thought it would be best to buy some cheap toy, and a small mountable camera to learn how to fly quadcopters, and to learn the ins and outs of video taken from this platform.
So, I purchased the 32 dollar(as of this writing) Syma X1 quadcopter, and a forty dollar 808, 16 keychain camera to mount onto it.
 |
| I specifically bought the UFO version because I intended to mount the camera right on top of it. However, the angles were too steep, and I had to cut out the center part of the dome to mount the 808 keychain camera. |
See the Syma X1 here, by clicking this link
The HD keychain camera that I bought for it is here, click me
Once I received the toy, I was immediately pleased.
That is of course until after I wrecked it a few times, and one of the motors became weak...
Then I had to find replacement parts, and had to start thinking about if my soldering iron had a small enough tip to do the soldering on the surface mount, wave soldered control board to replace the broken motor...

With the camera, it is a whole different story though. I have to wait until I get my new motor from banggood.com until I start major flights with the camera.
So, while I was waiting, I started the process of learning how to bond the camera to the Syma for flight, and the following is that process, with an additional mod that helps me tell what direction the model is flying in.
REV ONE MOUNTING
 |
| Although I ultimately wanted a bottom mount camera, I decided to first mount it on the top so when I crash, it won't destroy the camera. |
 |
| The camera is stuck on top there with the provided velcro |
REV 2 MOUNTING SCHEME
 |
| The toy flew better(more balanced) with this setup, but it still wasn't completely what I wanted. I will include a link below to this flight after I upload it. |
Onto REV 3
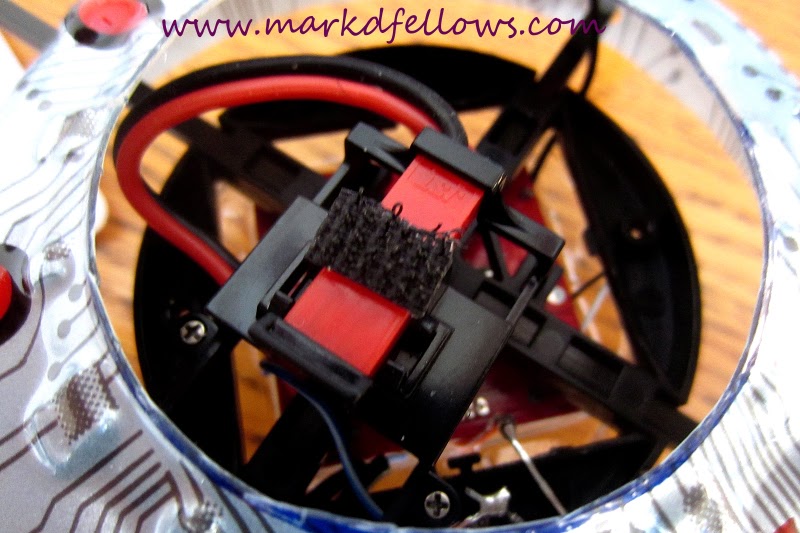 |
| The canopy is reversed so it is on the bottom. I put some small pieces of Velcro to help hold the camera |
 |
| I believe this is the final rev for this setup. The camera Is stuck on with Velcro, and the rubber band. You can also see the lifting suspension I came up with to elevate the model, and maybe soften landings. |
With this setup, you can reverse the setup for top, or bottom mounted cameras.
Other modifications
 |
| This of course is made up of plastic tie wraps. I used a hair dryer to heat up the tie wraps until they were shiny, bent them into the form I wanted, and let them cool in that configuration. I am not sure if this softens the landings, or just shifts the phase of the impact. For example, instead of getting a sharp spike in acceleration, It turns the landing into more of an oscillation. |
When the model flew away from me, I couldn't tell which direction it was facing in the distance, so I added a red LED in the back of the craft.
 |
| I cut holes in the body with a push pin spaced at the same distance as the LED leads. |
 |
| The LED I got from Radio Shack. It is a 25mA, 3 volt. I soldered a 1/8th watt, 100 ohm resistor in series with it which should source 12mA of current at full battery charge(4.2 volts) I soldered the led supply wires to the power pads on top of the board |
You know, it is harder than you might think to find a level surface to let the quad calibrate "level" on before you fly it...
So I came up with this case, and screwed levels in the X and Y axis so that I can tell when it is level.
Not only is a good launching platform, it is also a great carrying case!

Front

Side

Action shot
New Camera Mount
 |
| This is cut out of a Talene Custard container. It allows not only a flat surface, but also enables me to replace the battery WITH the camera already mounted. |
NOTE: I had to trim the battery mount a little with some diagonal pliers to get the mount to fit flush.
 |
| I glued on the plastic platform with hot melt glue. I also filled in the sides, so when I put on the rubber bands, the platform has a solid piece to be wedged against. |
 |
| This is what it looks like with the two rubber bands holding it in place. I could have centered that platform a little better... |
Mark
No comments:
Post a Comment